Installing a drying cloth rack on a balcony railing is a practical solution for those looking to efficiently dry their clothes while saving space. As a trusted Drying Cloth Rack supplier, I'm here to guide you through the process step by step. In this blog, I'll not only provide you with a detailed installation guide but also introduce you to some of our high - quality products that are perfect for balcony railing installation.
Step 1: Choose the Right Drying Cloth Rack
Before you start the installation process, it's crucial to select the appropriate drying cloth rack for your balcony railing. There are several types available, each with its own features and benefits.
- Plastic Clothes Drying Rack: These racks are lightweight, affordable, and resistant to rust. They are ideal for small balconies or for those who need a temporary drying solution. Check out our Plastic Clothes Drying Rack for a wide range of options.
- Hanging Drying Rack With Clips: This type of rack is great for drying delicate items such as lingerie, socks, and baby clothes. The clips ensure that your clothes stay in place even on windy days. Explore our Hanging Drying Rack With Clips collection for stylish and functional designs.
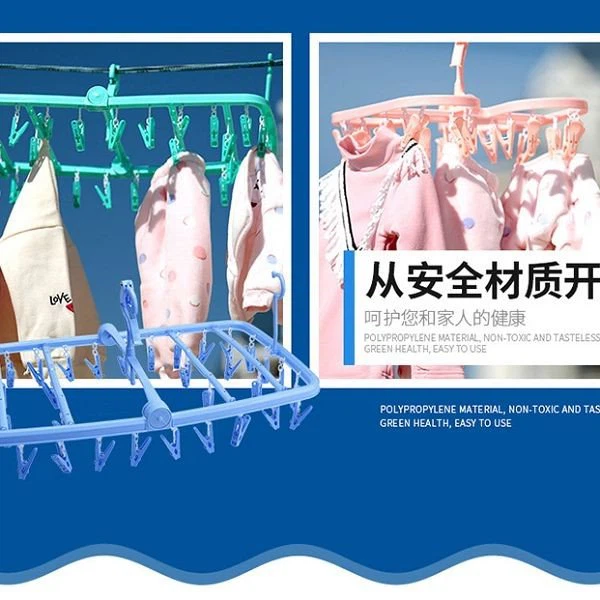
- Outdoor Plastic Hanging Rack: If you have a larger balcony and need to dry a significant amount of laundry, an outdoor plastic hanging rack is a great choice. It can hold multiple items at once and is designed to withstand outdoor elements. Take a look at our Outdoor Plastic Hanging Rack for durable and practical options.
Step 2: Gather the Necessary Tools
Once you've chosen the right drying cloth rack, it's time to gather the tools you'll need for the installation. Here's a list of the basic tools:
- Screwdriver (Phillips or flat - head, depending on the rack's hardware)
- Measuring tape
- Level
- Pencil
Step 3: Prepare the Balcony Railing
Before installing the drying cloth rack, you need to prepare the balcony railing. Start by cleaning the railing to ensure that there is no dirt, dust, or debris that could interfere with the installation. Use a damp cloth to wipe down the railing and let it dry completely.
Next, measure the width of the balcony railing. This measurement is essential as it will help you determine if the drying cloth rack you've chosen will fit properly. Most drying cloth racks are adjustable, but it's still important to double - check the dimensions.
Step 4: Position the Drying Cloth Rack
Using the measuring tape and level, determine the best position for the drying cloth rack on the balcony railing. You want to place it in a location where it will receive plenty of sunlight and good air circulation. This will help your clothes dry faster.
Mark the position of the rack on the railing using a pencil. Make sure the marks are straight and level. If the rack has multiple parts, assemble them according to the manufacturer's instructions before proceeding.

Step 5: Install the Drying Cloth Rack
Now it's time to install the drying cloth rack. If the rack comes with brackets, align the brackets with the marks you made on the balcony railing. Use the screwdriver to secure the brackets to the railing. Make sure the brackets are tightened firmly to ensure the stability of the rack.
If the rack is a hanging type, simply hang it over the balcony railing. Some hanging racks may have additional hooks or clips to secure them in place. Make sure these are properly attached to prevent the rack from falling off.
Step 6: Test the Drying Cloth Rack
Once the drying cloth rack is installed, give it a gentle shake to test its stability. If it wobbles or feels loose, check the brackets or hooks to make sure they are tightened properly. Adjust the position of the rack if necessary.
Now, you can start using your new drying cloth rack. Hang your clothes on the rack and enjoy the convenience of having a dedicated space to dry your laundry on the balcony.
Maintenance Tips
To ensure the longevity of your drying cloth rack, it's important to perform regular maintenance. Here are some tips:
- Clean the rack regularly to prevent the buildup of dirt and grime. You can use a mild detergent and water to clean the rack.
- Check the hardware periodically to make sure all the screws and bolts are tightened. Loose hardware can cause the rack to become unstable.
- If the rack is made of plastic, avoid exposing it to direct sunlight for extended periods as this can cause the plastic to fade and become brittle.
Why Choose Our Drying Cloth Racks?
As a leading Drying Cloth Rack supplier, we take pride in offering high - quality products that are designed to meet the needs of our customers. Our drying cloth racks are made from durable materials, ensuring that they will last for years. We also offer a wide range of styles and designs to suit different balcony sizes and personal preferences.
Whether you're looking for a simple plastic drying rack or a more elaborate hanging rack with clips, we have the perfect solution for you. Our products are competitively priced, and we offer excellent customer service to ensure your satisfaction.
Contact Us for Procurement
If you're interested in purchasing a drying cloth rack for your balcony or for a larger commercial project, we'd love to hear from you. Our team of experts is ready to assist you in choosing the right product and answering any questions you may have. Contact us today to start the procurement process and take advantage of our high - quality drying cloth racks.
References
- Home Improvement Guides: Various DIY home improvement websites that provide general information on installing outdoor fixtures.
- Drying Cloth Rack Manufacturer's Manuals: The manuals that come with the drying cloth racks, which provide specific installation instructions and safety guidelines.